Learn how to replace a garage door opener battery step-by-step with this simple homeowner’s guide. Ensure smooth operation and avoid costly repairs with easy maintenance tips.
When your garage door opener fails to work, it’s more than a mere inconvenience; it poses a serious security threat. A common issue is a dead battery in the remote or wall panel. Knowing how to replace garage door opener batteries is an essential skill for every homeowner to master.
Replacing a dead battery can quickly restore the function of your garage door opener and enhance home security. In this guide, we’ll walk you through each step to ensure you get your opener back in action. If you prefer professional help, Lincoln Garage Doors can assist you with the process efficiently and effectively.

Why Replacing Your Garage Door Opener Battery Matters
Replacing your garage door opener battery is essential for ensuring your opener operates smoothly and reliably. A weak or dead battery can result in frustrating issues that disrupt your daily routine. Here are some signs that your battery may need replacing:
- Intermittent Opening or No Response: The garage door opens sporadically or doesn’t open at all, even when you press the remote or wall control.
- Remote Works Only When Close: If your remote control only works when you’re near the door, it could indicate that the battery is losing its charge.
- Low Battery Warning on Wall Control: A flashing low battery indicator on the wall control panel signals that it’s time to replace the battery.
- Beeping Sound from Opener: Backup systems often emit a beeping sound when the battery is low or failing, alerting you to replace it before total failure.
Regular battery replacement helps prevent inconvenience and prolongs the life of your opener system.
Safety and Security Risks of a Dead Battery
When your opener’s battery is dead, it compromises the security of your home. You may have to leave your garage unlocked or operate the door manually, which could increase the risk of theft or unauthorized access.
How Often Should You Replace It?
On average, opener remote batteries should be replaced every 1 to 2 years. For openers with battery backup systems, check the battery every 12 months and replace it every 2 to 3 years.
Tools You’ll Need for a Quick Battery Swap
To ensure a smooth and efficient battery replacement process, here are the tools and supplies you’ll need:
- Compatible Battery Types
Check your new garage door opener manual or remote casing for the appropriate battery type. Common options include:
- CR2032 (button cell)
- A23 (miniature)
- 9V (for wall panels or backup batteries)
- Basic Tools to Keep Handy
- Flathead or Phillips screwdriver: To open the battery compartment.
- Clean cloth or gloves: To avoid dirt or oil from transferring onto the battery.
- Flashlight: For checking inside battery compartments in low-light conditions.
Safety First – Unplug the Opener
Before beginning, unplug the garage door opener from the power source. This ensures your safety by preventing accidental activation or electrical issues while replacing the battery. Always prioritize safety during any maintenance task!
Step-by-Step: How to Replace a Garage Door Opener Battery
Step 1 – Identify Your Opener Type
Different brands have different battery access points:
- LiftMaster: the battery is typically located inside the remote or near the backup unit
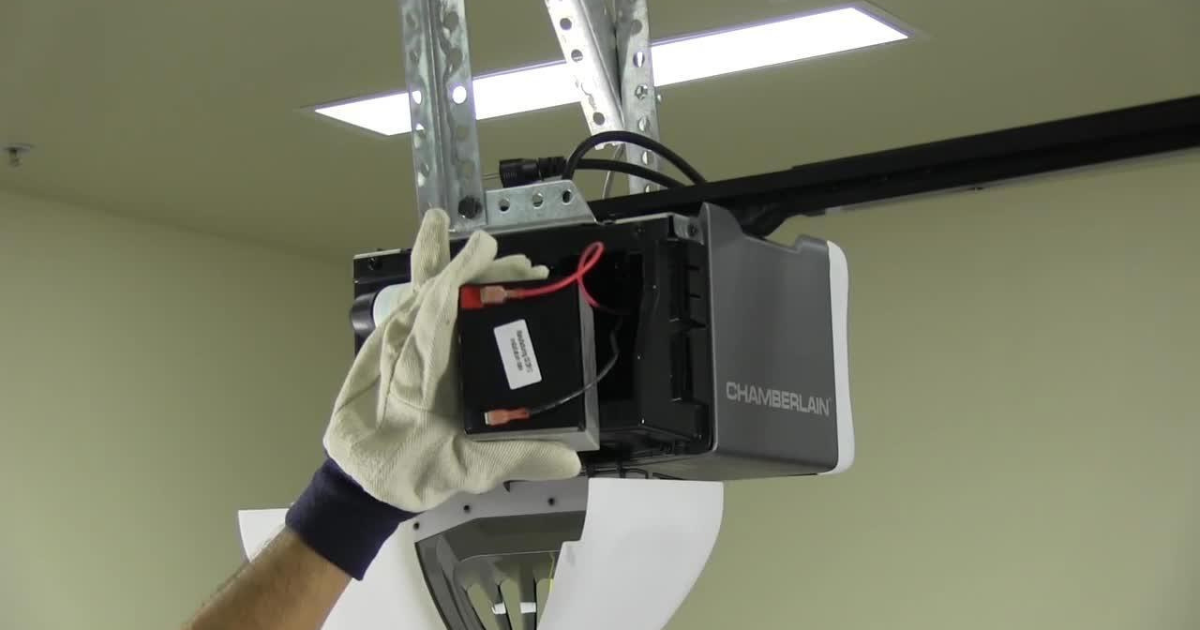
- Chamberlain: similar to LiftMaster, with a backup battery behind the light cover
- Genie: backup battery located inside wall control or power head
Step 2 – Remove the Battery Cover
Use a screwdriver to gently remove the battery cover or pry it open, depending on the model of your opener. Avoid using excessive force, as this can damage the casing or the internal components. Carefully remove the cover to access the battery compartment.
Step 3 – Take Out and Replace the Battery
Before removing the old battery, make sure to note its orientation. This will ensure you place the new battery in the correct direction. Insert the new battery with the same polarity to avoid any operational issues. Double-check the placement to ensure a secure connection.
Step 4 – Test the Remote and Wall Panel
Once the new battery is installed, test the garage door opener’s remote and wall panel. Press the buttons to check if they’re functioning properly. If the opener isn’t responding, inspect for battery corrosion or recheck the battery orientation to ensure everything is in place.
Troubleshooting After Battery Replacement
Remote Still Not Working?
- Recheck battery orientation
- Confirm the correct battery type
- Try reprogramming the remote
Door Opens But Doesn’t Close?
- Check the safety sensor alignment
- Verify there’s no obstruction near the base of the door
- Try resetting the system
When to Call a Technician
If issues persist even after replacing the battery and checking settings, there may be a deeper issue with the circuit board, sensor, or wiring.
How Battery Life Affects Garage Door Opener Performance
Impact on Range and Responsiveness
A weak battery reduces remote range and may cause delayed door response or failure to operate in cold weather.
Battery vs. Power Backup Systems
Some models come with built-in battery backups for power outages. These batteries power the entire opener system temporarily and need replacing every 2-3 years.
How to Extend Battery Life
- Store remotes in cool, dry areas
- Avoid pressing remote buttons unnecessarily
- Replace backup batteries during routine garage door inspections
Battery Tips Based on Your Opener Brand
Chamberlain Battery Replacement Tips
Check for the “Learn” button near the antenna. The battery backup is behind the light cover and is easy to remove with minimal tools.
Genie Battery Compartment Details
Wall-mounted Genie control panels may house the battery. For backup systems, open the unit using a screwdriver and follow the instructions in the user manual.
LiftMaster Battery Backup Considerations
LiftMaster openers typically emit a beeping sound when the battery is low. The battery is housed inside a compartment behind the light lens.
Maintenance Tips to Avoid Battery-Related Issues
Monthly Testing Routine
Test your opener monthly by operating it via the remote and control panel. If either fails to respond promptly, check the battery.
Keeping Remote Dry & Dust-Free
Dust and moisture can damage the internal contacts of remotes. Store remotes off the floor and clean with a soft cloth regularly.
Scheduling Seasonal Checkups
Plan inspections during fall and spring to prevent battery failure during extreme temperatures.
DIY vs. Professional Battery Replacement
When DIY Makes Sense
If you’re comfortable using basic tools and have easy access to the battery compartment, you can safely replace most remote or backup batteries yourself.
Why You Might Need a Pro
For integrated backup systems, electrical issues, or inaccessible battery compartments, a professional ensures safe and proper replacement.
Common Mistakes to Avoid When Replacing the Battery
Using the Wrong Battery Type
Always check the owner’s manual or the old battery label. The wrong battery can damage the remote or opener system.
Damaging Internal Circuitry
Avoid prying too hard or touching internal components. Use tools gently and work in a static-free environment when possible.
Forgetting to Reprogram After Replacement
Some openers require re-syncing the remote after battery replacement. Refer to the manual for specific instructions.
Final Check – Is It Just the Battery?
Signs of a Deeper Problem
- The door opens only halfway
- You hear clicking but no movement
- Safety sensors blink or show red lights
When It’s Time for a New Opener
If your opener is over 10 years old and has frequent issues, it may be more cost-effective to upgrade.
Schedule an Inspection
A professional inspection can determine if the problem is battery-related or mechanical. Lincoln Garage Doors offers comprehensive checks for peace of mind.

Frequently Asked Questions (FAQ)
Do I need to reprogram the remote after battery replacement?
Not always, but some models may require reprogramming after battery replacement. To be sure, consult your garage door opener’s manual or visit the manufacturer’s website for specific instructions based on your model.
How long does a garage door opener battery last?
The typical lifespan of a remote battery is 1-2 years, while backup system batteries last around 2-3 years with proper care. Regularly replacing the batteries helps ensure your garage door opener functions reliably.
Can I use rechargeable batteries in my garage door remote?
While it’s tempting to use rechargeable batteries, it’s best to follow the manufacturer’s recommendation. Rechargeable batteries may not match the voltage of standard batteries, leading to potential performance issues with your garage door remote. Always use the specified battery type.
Conclusion
Replacing your garage door opener battery is a simple yet essential task that can save you from frustration down the line. Whether you’re dealing with a malfunctioning remote or a non-responsive opener, knowing how to replace a garage door opener battery will help you maintain smooth functionality and avoid unnecessary garage door repairs. By following the step-by-step guide we’ve provided, you can confidently tackle this maintenance task yourself, saving both time and money.
Remember, if you notice ongoing issues even after replacing the battery, it might be time to consult a professional to ensure your system is in top condition. Regularly checking and replacing the battery as needed is a great way to keep your garage door opener functioning optimally for years to come.
End Note
Lincoln Garage Doors is your trusted partner for all garage door services, offering reliable solutions for opener repairs, replacements, and installations. Whether you need a quick fix or a comprehensive upgrade, our professional team in Lincoln is ready to deliver fast, expert service. Visit our website to learn more about our residential and commercial services, or browse through our gallery to see our work firsthand.
Looking for fast and reliable service? You can easily contact us for a consultation or service appointment. Don’t just take our word for it—check out our reviews to hear from satisfied customers. For more details on all our services, visit our service page. Follow us on Twitter for updates and stay in the loop with Lincoln Garage Doors.
Lincoln Garage Doors LLC
6335 Camp Bullis Rd Ste 18, San Antonio, TX 78257
+12104058225