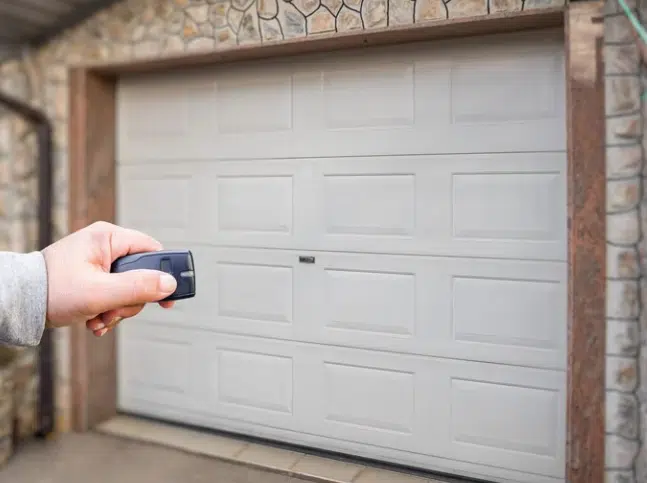
A damaged or worn garage door bottom seal can cause problems like water leaks, dirt buildup, and pest entry. If your garage floor often gets wet or drafty, it may be time to act. You do not need special skills for this task. This guide will show the easy way to replace the garage door bottom seal using simple tools and clear instructions.
In this 2025 step-by-step guide, we will explain what tools you need, how to prepare the surface, and the best method to create a secure seal that lasts. Whether you want better insulation, fewer bugs, or a cleaner space, this DIY solution offers real results. Start now and improve your garage with a simple fix that makes a big difference.

Why You Should Replace Your Garage Door Bottom Seal
A bottom seal on your garage door keeps out dust, moisture, and pests while helping maintain indoor temperature. It closes the gap between the door and the floor to improve protection. Over time, this seal can crack or flatten from use and weather. Fixing it quickly helps protect your space and lowers your energy bills. It also keeps your garage more comfortable.
When the seal wears out, it lets in cold air and pests, raising heating costs and even damaging stored items. The simplest way to change your garage door bottom seal is by following clear, step-by-step instructions. Using basic tools and a bit of time, you can greatly improve your garage’s seal and protection.
Tools & Materials You’ll Needed for Replacing Garage Door Bottom Seal
It’s a good idea to collect all the necessary items before beginning. Getting the proper tools and supplies ahead of time helps you finish the job faster and with less hassle. Here’s what you’ll need for the easy way to replace the garage door bottom seal.
| Tool/Material | Purpose | Helpful Tips |
| Flathead Screwdriver | It helps remove old seals or pry up nailed sections. | Use gentle pressure to avoid damaging or warping the track or door frame. |
| Utility Knife | Let’s trim the new seal to the correct length for a secure fit. | Make a straight cut for a better fit. |
| Pliers | It helps pull out stubborn nails or old seal pieces. | Needle-nose pliers work best in tight spots. |
| Tape Measure | Ensure the new seal matches your garage door’s width. | Measure twice to avoid mistakes. |
| Silicone-Based Lubricant | Makes it easier for the new seal to glide smoothly into the track. | Use a small amount to prevent slipping during installation. |
| Garage Door Bottom Seal | The new piece keeps out moisture, debris, and insects. | Choose a seal type that fits your door model (T-style or bulb style). |
| Retainer Track (if needed) | Holds the seal in place for track-style installations. | Clean the track before inserting the new seal. |
| Safety Gloves | Safeguards your hands during work with pointed tools and uneven surfaces. | Wear gloves throughout to avoid cuts and splinters. |
Having all these items nearby will help you avoid delays and get the job done right the first time.
Steps to Remove an Old and Damaged Garage Door Bottom Seal
Removing the old bottom seal is the first step before installing a new one. Follow these steps to prepare your garage for the easy way to replace the garage door bottom seal smoothly and without hassle.
1. Open the Garage Door Fully
Raise the garage door fully so you can safely reach the bottom edge. This gives you enough space to work comfortably and reduces the chance of bending or damage.
2. Check the Seal Type
Carefully examine the way the existing seal is fixed to the door. It may slide into a track or be nailed or screwed in. Knowing the type helps you remove it the right way.
3. Apply Lubricant if in a Track
If your seal slides in a track, spray silicone lubricant along the track to loosen the old seal. This helps reduce friction and makes the removal process much easier.
4. Pull Out the Seal
Use pliers to grip one end of the old seal and slowly pull it out of the track. Take your time to prevent ripping the seal or warping the metal frame.
5. Remove Nails or Screws
If the seal is nailed or screwed in, gently remove each fastener using a flathead screwdriver or pry tool. Go slowly to prevent damage to the door’s bottom section.
6. Clean the Bottom of the Door
Clean the surface where the old seal was previously installed. Remove any leftover pieces, dirt, or glue. A smooth, dirt-free surface allows the new seal to fit properly and stay durable over time.
Step-by-Step Guide: Easy Way to Replace Garage Door Bottom Seal
Installing a new bottom seal quickly protects your garage from drafts, bugs, and water. Follow this simple guide for the easy way to replace the garage door bottom seal.
Step 1: Measure and Lay Out the New Seal
Place the new seal beside your garage door to check its length. Before starting, make sure it matches the width. Using a sharp utility knife, trim off any extra length.
Step 2: Trim the Seal if Necessary
If the new seal is longer than your door, carefully cut it to size. A clean and even cut helps ensure that it fits snugly without gaps or overlaps.
Step 3: Insert Seal into Retainer Track
For track-style seals, slide one end into the retainer track and gently push it through. Go slow to avoid twisting. It’s easier with a second person guiding from the other end.
Step 4: Secure Nail-On Type Seals
If using a nail-on seal, line it up with the bottom of the door. Drill small pilot holes to avoid splitting the seal, then use screws or nails to attach it firmly.
Step 5: Check for a Tight Floor Seal
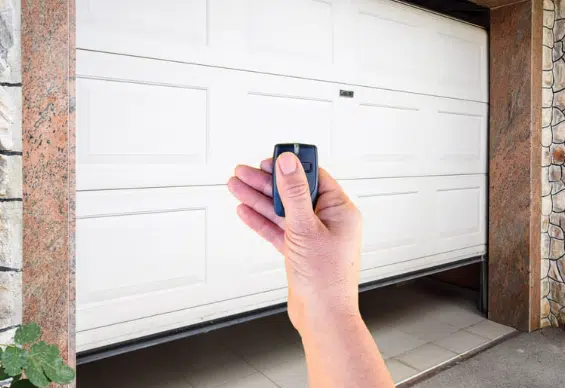
Make sure the seal is pressed tightly against the floor. It should have no space underneath. This step helps block air, dust, water, and pests from sneaking into your garage.
Step 6: Close and Test the Garage Door
Shut the door slowly and look for any gaps or light peeking through. If you see leaks, adjust the seal position until it’s flush and tight against the ground.
Fixing Common Issues During Garage Door Bottom Seal Replacement
Even with simple steps, you might run into minor problems during the process. This guide helps you fix those issues and finish the easy way to replace the garage door bottom seal right.
- Seal Won’t Slide Into Track: If the seal sticks while sliding in, apply more silicone lubricant and check that the track is clean and straight for smoother installation.
- Seal Bunches Up While Inserting: When the seal folds or twists during installation, remove it and reinsert slowly, guiding it evenly through the retainer track without pulling too hard.
- Seal Warps After Screwing In: Tightening screws too much can bend or warp the seal. Use moderate pressure when securing it to keep the seal flat and flush against the door.
- Seal Doesn’t Touch the Floor: If gaps show under the door, the seal may be too thin, or the floor is uneven. Try a thicker seal designed to work on rough surfaces.
- Seal Keeps Slipping Out: A loose seal might mean the track is too broad or worn out. Gently crimp the track or use adhesive to keep the seal in place.
- Seal Ends Stick Out Unevenly: If the ends stick out, measure and trim them again. A straight cut ensures the seal fits neatly without bending or leaving gaps.
How to Maintain Your New Garage Door Bottom Seal
Now that your seal is in place, proper care will help it stay in good shape for a long time. Here’s how to keep the easy way to replace garage door bottom seal effective.
1. Keep the Door Bottom Clean
Wipe dirt, mud, or leaves regularly from the bottom of the new garage door to prevent debris from breaking down or damaging the seal.
2. Use the Right Lubricant
Avoid oil-based sprays that can harm the rubber. Stick to silicone-based lubricants to keep the seal flexible and prevent drying, cracking, or sticking to the floor.
3. Inspect for Cracks or Wear
Check the seal every few months. Look for signs of cracking, flattening, or drying. Spotting damage early lets you fix or replace it before problems start.
4. Watch for Loose Seals
If the seal starts slipping out or feels loose, it may need a simple adjustment or reinstallation to keep your garage sealed tight and energy-efficient.
5. Replace When Needed
Even with care, seals eventually wear out. If it’s no longer sealing tightly, replace it immediately to avoid letting in water, pests, or cold air.
With these easy care tips, your seal will last longer and work better. Maintenance goes a long way in keeping your garage clean and protected.

FAQs About Easy Way to Replace Garage Door Bottom Seal
How tight should the bottom seal on my garage door be?
The bottom seal should press firmly against the floor without making the door hard to open or close. It must block water, air, and pests while allowing smooth movement. Adjust or reinstall it for a better fit if it’s too loose or tight.
How can I remove an old garage door seal without messing up the door?
Open the garage door and use a flathead screwdriver or pliers to remove an old seal safely. Gently pull or unscrew it, depending on how it’s attached. Go slow to avoid scratching the door or bending the metal track during removal.
Why is there still a gap after I changed my garage door seal?
If there’s a gap, your seal might be too thin or not installed evenly. Check for uneven flooring, improper alignment, or a twisted seal. Try adjusting the seal or using a thicker one to close bigger gaps under the door.
Should I use a screw-on or slide-in seal for my garage door?
Both work well, but slide-in seals are easier to install and replace. Screw-on seals are more secure on older doors without tracks. Pick one based on your door type and what’s easier to manage. Either one fits the easy way to replace the garage door bottom seal.
Conclusion
A worn-out seal may seem small, but it can lead to big problems like water damage, drafts, and higher energy bills. The easy way to replace the garage door bottom seal gives you fast results using simple tools and straightforward steps. This fix improves comfort, protection, and garage performance.
Taking time to handle the job yourself helps you avoid costly repairs later. It also keeps your garage cleaner and more energy-efficient. If you need help or a full inspection, you can count on our expert garage door repair in San Antonio, TX, to do it right.
Lincoln Garage Doors is your trusted garage door repair and installation team in San Antonio, TX. Whether you’re replacing a seal or upgrading your entire door, we deliver quality service every time. Contact us today, and let’s get your garage back in shape.
End Note
At Lincoln Garage Doors, we proudly serve homeowners and businesses with top-quality garage door services you can trust. Our team handles every project carefully and precisely, from expert residential to dependable commercial garage door solutions. You can explore everything we offer on our main website or dive into our full list of garage door services to find the right fit for your needs.
We take care of everything from reliable garage door repair and fast spring repair to smooth garage door opener installations. To help you avoid problems, we also offer scheduled maintenance and quick-response 24/7 emergency garage door services, ensuring your door is always safe and working properly.
Get to know us better through our About Us page and check out the cities we serve. Don’t miss our exclusive specials, stunning gallery, impressive before-and-after projects, and genuine customer reviews. When you’re ready to start, use our easy Schedule Online page or Contact Us to schedule your service with us today.
Lincoln Garage Doors LLC
6335 Camp Bullis Rd Ste 18, San Antonio, TX 78257
+12104058225